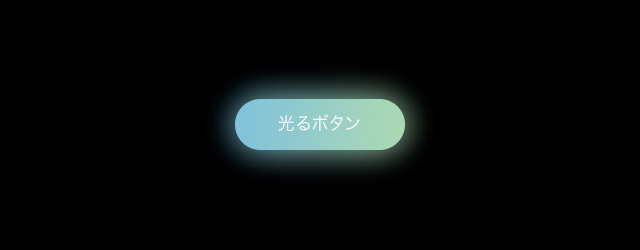
今回紹介するのは、マウスを乗せると光るボタンの作り方です。CSSだけで実装しているので一度つくれば使い回せるのも便利ですよ。
CSSだけでボタンに光るエフェクトをつける
完成済のサンプルを用意してみました。マウスを乗せるとグラデーションが動きながらゆらゆらと光ります。以下のリンクから実際にさわってみてください。
(PCでみてください)
HTML
HTMLはただのaタグなのでとてもシンプル。”button”のclassを付けています。
|
1 |
<a href="#" class="button">光るボタン</a> |
CSS
CSSはこんな感じになっています。
|
1 2 3 4 5 6 7 8 9 10 11 12 13 14 15 16 17 18 19 20 21 22 23 24 25 26 27 28 29 30 31 32 33 34 35 36 37 38 39 40 41 42 43 44 45 46 47 48 49 50 51 52 53 54 55 56 57 58 59 60 61 62 |
.button { display: inline-block; text-decoration: none; color: white; width: 10em; height: 3em; line-height: 3em; text-align: center; border-radius: 1.5em; background-image: -webkit-gradient(linear, left top, right top, from(#64b3f4), color-stop(#c2e59c), to(#64b3f4)); background-image: linear-gradient(to right, #64b3f4, #c2e59c, #64b3f4); background-size: 400%; position: relative; z-index: 2; } .button::before { content: ""; position: absolute; z-index: 1; top: 0; left: 0; right: 0; bottom: 0; z-index: -1; border-radius: 1.5em; background: inherit; -webkit-filter: blur(1em); filter: blur(1em); opacity: 0; -webkit-transition: opacity 0.6s; transition: opacity 0.6s; } .button:hover { -webkit-animation: glow 6s linear infinite; animation: glow 6s linear infinite; } .button:hover::before { -webkit-animation: glow 6s linear infinite; animation: glow 6s linear infinite; opacity: 1; } @-webkit-keyframes glow { 0% { background-position: 0%; } 100% { background-position: 400%; } } @keyframes glow { 0% { background-position: 0%; } 100% { background-position: 400%; } } |
色をカスタマイズして使う
色を変更して使いたいときは、10~11行目の”background-image”の色を変更すればOKです。
|
1 2 |
background-image: -webkit-gradient(linear, left top, right top, from(#64b3f4), color-stop(#c2e59c), to(#64b3f4)); background-image: linear-gradient(to right, #64b3f4, #c2e59c, #64b3f4); |
まとめ
というわけで今回は、オンマウスで光るボタンの作り方でした。
今回のサンプルのように暗めの背景の上で使うと、怪しく光るような雰囲気があっていい感じ。気に入って頂けたらコピペして使ってOKなので、ぜひ参考にしてみてくださいね。

