ちょっとした見出しの装飾くらいなら、CSSだけで作ることが多いと思います。でも、CSSだけで出来ることには制限もあるし、なかなかシックリくるデザインを考えるのも大変ですよね。
というわけで、今回はCSSの見出し特集です。気に入ったものがあればコピペして使ってOK!ぜひ参考にしてみてくださいね。
まずはサンプル集をどうぞ
見出しデザインのサンプル集はこちら。まずはざっくりチェックしてみてください。
それでは、それぞれのCSSコードを紹介していきます。
HTML
見出しのHTMLは以下のように「title」というclassを付けています。自分で使うときはh2やh3などにすることもあると思うので適宜変更して使いましょう。
|
1 |
<p class="title">CSSで作るタイトル</p> |
では、装飾用のCSSを紹介していきます。
01:シンプルなボーダー見出し

まずはシンプルにボーダーを使った装飾。ブログやニュースサイトでよく使われますね。
|
1 2 3 4 5 6 |
.title { font-size: 18px; font-weight: 700; border-bottom: 2px solid #333; padding-bottom: 0.5em; } |
02:二種類のボーダー見出し

こちらは二種類のボーダーの組み合わせ。これもよく見かけるデザインです。
|
1 2 3 4 5 6 7 |
.title { font-size: 18px; font-weight: 700; border-left: 3px solid #333; border-bottom: 1px solid #ccc; padding: .5em 1em; } |
03:左右ボーダー見出し

見出しの左右にボーダーを引いて装飾してもの。flex-boxとbefore,afterを使っています。
|
1 2 3 4 5 6 7 8 9 10 11 12 13 14 15 16 17 18 19 20 21 22 23 24 |
.title { font-size: 18px; font-weight: 700; display: -webkit-box; display: -ms-flexbox; display: flex; -webkit-box-pack: center; -ms-flex-pack: center; justify-content: center; -webkit-box-align: center; -ms-flex-align: center; align-items: center; } .title::before, .title::after { content: ""; width: 3em; border-top: 1px solid #333; } .title::before { margin-right: 1em; } .title::after { margin-left: 1em; } |
04:左右ボーダー見出し(二重線)

左右のボーダーを二重線にしたもの。装飾性がアップしますね。
|
1 2 3 4 5 6 7 8 9 10 11 12 13 14 15 16 17 18 19 20 21 22 23 24 |
.title { font-size: 18px; font-weight: 700; display: -webkit-box; display: -ms-flexbox; display: flex; -webkit-box-pack: center; -ms-flex-pack: center; justify-content: center; -webkit-box-align: center; -ms-flex-align: center; align-items: center; } .title::before, .title::after { content: ""; width: 3em; border-top: 3px double #333; } .title::before { margin-right: 1em; } .title::after { margin-left: 1em; } |
05:カギカッコ付き見出し

cssだけでカギカッコをつけることも出来ます。キャッチコピーを入れたり、インタビュー記事の中の一言を際立たせたりするとき便利。
|
1 2 3 4 5 6 7 8 9 10 11 12 13 14 15 16 17 18 19 20 21 22 23 24 25 26 27 28 29 30 31 32 |
.title { font-size: 18px; font-weight: 700; display: -webkit-box; display: -ms-flexbox; display: flex; -webkit-box-pack: center; -ms-flex-pack: center; justify-content: center; -webkit-box-align: center; -ms-flex-align: center; align-items: center; height: 3em; line-height: 3em; } .title::before, .title::after { content: ""; width: 2em; height: 2em; } .title::before { margin-right: 1em; border-top: 3px solid #333; border-left: 3px solid #333; margin-top: -1em; } .title::after { margin-left: 1em; border-bottom: 3px solid #333; border-right: 3px solid #333; margin-bottom: -1em; } |
06:カギカッコ付き見出し(二重線)

borderのスタイルを変えれば二重線に。他にも破線や点線にも簡単にカスタマイズできますね。
|
1 2 3 4 5 6 7 8 9 10 11 12 13 14 15 16 17 18 19 20 21 22 23 24 25 26 27 28 29 30 31 32 |
.title { font-size: 18px; font-weight: 700; display: -webkit-box; display: -ms-flexbox; display: flex; -webkit-box-pack: center; -ms-flex-pack: center; justify-content: center; -webkit-box-align: center; -ms-flex-align: center; align-items: center; height: 3em; line-height: 3em; } .title::before, .title::after { content: ""; width: 2em; height: 2em; } .title::before { margin-right: 1em; border-top: 3px double #333; border-left: 3px double #333; margin-top: -1em; } .title::after { margin-left: 1em; border-bottom: 3px double #333; border-right: 3px double #333; margin-bottom: -1em; } |
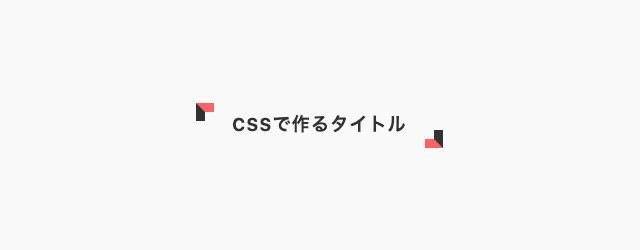
07:カギカッコ付き見出し(2色)

borderを太くして2色にしました。アイコンっぽくて可愛いですね。なかなか使い勝手が良さそう。
|
1 2 3 4 5 6 7 8 9 10 11 12 13 14 15 16 17 18 19 20 21 22 23 24 25 26 27 28 29 30 31 32 |
.title { font-size: 18px; font-weight: 700; display: -webkit-box; display: -ms-flexbox; display: flex; -webkit-box-pack: center; -ms-flex-pack: center; justify-content: center; -webkit-box-align: center; -ms-flex-align: center; align-items: center; height: 3em; line-height: 3em; } .title::before, .title::after { content: ""; width: 1em; height: 1em; } .title::before { margin-right: 1em; border-top: 0.5em solid #999; border-left: 0.5em solid #333; margin-top: -1.5em; } .title::after { margin-left: 1em; border-bottom: 0.5em solid #999; border-right: 0.5em solid #333; margin-bottom: -1.5em; } |
08:シンプルな背景

背景をつけて見出しを目立たせました。
|
1 2 3 4 5 6 7 |
.title { font-size: 18px; font-weight: 700; text-align: center; background: #eee; padding: 0.75em 1em; } |
09:ストライプ柄の背景見出し

背景をストライプ柄にしています。cssだけで出来て色も自由にカスタマイズできます。
|
1 2 3 4 5 6 7 8 |
.title { font-size: 18px; font-weight: 700; text-align: center; background-image: linear-gradient(-45deg, #e5f4ff 35%, #ebfaff 35%, #ebfaff 50%, #e5f4ff 50%, #e5f4ff 85%, #ebfaff 85%, #ebfaff); background-size: 14px 14px; padding: 0.75em 1em; } |
10:網掛け風背景の見出し

ストライプ柄の角度を変えて2つ重ねると網掛け風に。CSSだけで作れる背景って意外にいろいろあります。
|
1 2 3 4 5 6 7 8 |
.title { font-size: 18px; font-weight: 700; text-align: center; padding: 1em; background-image: repeating-linear-gradient(45deg, #f3f3f3 0, #f3f3f3 1px, transparent 0, transparent 50%), repeating-linear-gradient(135deg, #f3f3f3 0, #f3f3f3 1px, transparent 0, transparent 50%); background-size: 8px 8px; } |
11:ボーダーと影をつかった見出し

ボーダーや影を組み合わせて装飾しています。細かいテクニックの組み合わせでこんな見出しも作れちゃいます。
|
1 2 3 4 5 6 7 8 9 10 11 12 13 14 15 16 17 18 19 20 |
.title { font-size: 18px; font-weight: 700; padding: 1em 1em 1em 1.5em; border: 1px solid #ddd; -webkit-box-shadow: 0px 3px 0px 0px rgba(0, 0, 0, 0.15); box-shadow: 0px 3px 0px 0px rgba(0, 0, 0, 0.15); position: relative; border-radius: 4px; } .title::before { position: absolute; top: 0.5em; left: 0.5em; content: ''; width: 6px; border-radius: 3px; height: calc(100% - 1em); background-color: #00b4ff; } |
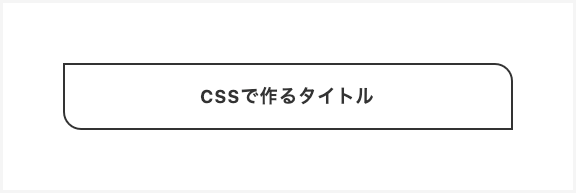
12:角丸ボーダーな見出し

シンプルに角丸をつけるだけでもデザイン性がアップします。片側だけを角丸にしてるのがポイント。
|
1 2 3 4 5 6 7 8 |
.title { font-size: 18px; font-weight: 700; text-align: center; border: 2px solid #333; border-radius: 0 1em; padding: 1em; } |
まとめ
CSSで出来ることって、昔に比べたらかなり増えてますよね。他にももっといろいろ出来そう。気が向いたら追加していくかもです!

